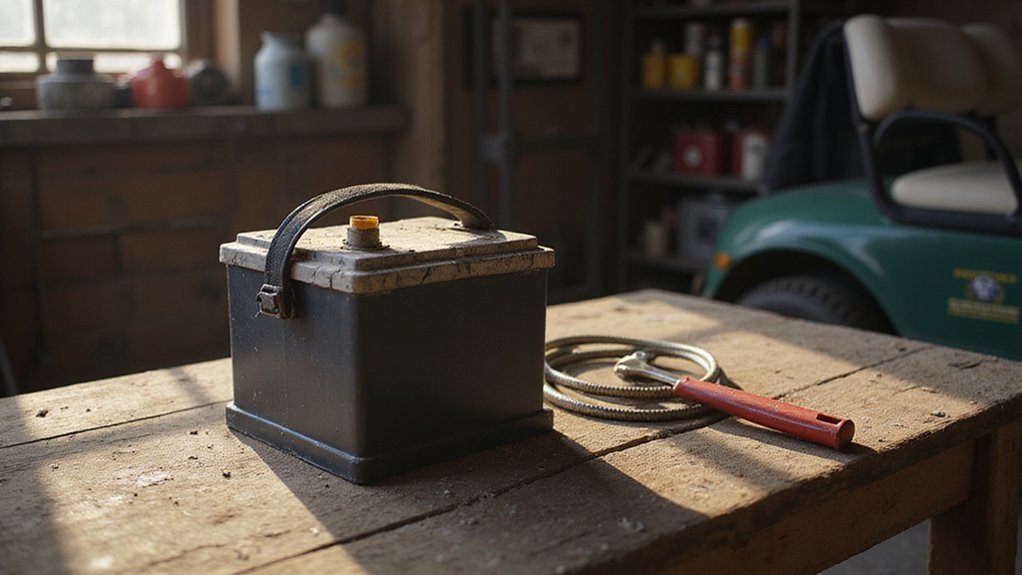
If you’re wondering how to swap out your golf cart batteries without hassle, you’re in the right place.
Replacing batteries can seem tricky, but with the right approach, you can do it yourself safely and effectively.
In this guide, you’ll learn the step-by-step process to get your golf cart running smoothly again.
Gather Your Tools and Safety Gear for Golf Cart Battery Replacement
Gathering your tools and safety gear before replacing golf cart batteries ensures the job is efficient and safe. You’ll need a wrench or socket set to loosen and tighten terminal hardware, as well as a torque wrench to secure connections to manufacturer specifications. Insulated nut drivers are essential for electrical safety, minimizing the risk of sparks and shorts. For maintenance, keep a supply of distilled water, a wire brush, and a baking soda solution on hand to neutralize acid spills. Organizing your tools with a tray or container keeps everything accessible and prevents misplacing small parts. Safety equipment is crucial: wear chemical-splash goggles, acid-resistant gloves, and closed-toe shoes to protect against potential splashes and accidental slips. Use a multimeter to check pack voltage and color-coded cable supports or labels to avoid confusion during reassembly. Keep water and a spill-response kit nearby in case of leaks. Always work in a well-ventilated area, away from sparks or open flames, to prevent hazardous fumes or fires. Proper preparation with these tools and safety measures helps make your battery replacement safe and straightforward. Additionally, cleaning terminal corrosion with a wire brush before installing new batteries helps maintain optimal electrical contact and prolongs battery life. For additional context on related cart upkeep, consult reviews of top golf cart tires for quality and performance comparisons. Choosing batteries that match your cart’s performance needs is also important, as quality and value directly impact how long your cart runs between charges, so check guides that compare top picks for reliability.

Used to fit the T105 Battery in E-Z-GO Vehicles

Input Voltage Range:18V-58V DC(18V/20V/24V/36V/48V)

Compatibility: Use golf cart battery water pump to ensure your golf cart battery remains in optimal condition. Suitable for golf carts, RVs, boats, and utility vehicles equipped with trojan hydroLink and flow rite pro fill watering systems. This method of adding water extends the lifespan of the battery and improves its performance while reducing maintenance costs
Map and Label Your Old Golf Cart Battery Layout Before Disconnecting
Before disconnecting your old golf cart battery pack, it is essential to map and label the existing layout thoroughly. Start by taking clear photographs of the entire battery bay, capturing both wide shots and close-ups of each terminal and cable route. Focus on the main positive and negative leads to ensure no detail is overlooked. Then, create a simple top-down sketch of the battery tray, numbering each battery sequentially from left to right. This sketch will serve as your wiring diagram for reinstallation.
Next, assign each battery a unique number, such as Battery 1 through Battery 6. Attach labels to each battery with these numbers for easy identification. Tag every jumper cable with the batteries it connects to, and mark terminal polarity with colored tape—red for positive, black for negative—to prevent confusion. Make sure to differentiate between interconnect jumpers and main pack cables. Trace the series chain—positive terminal of one battery connecting to the negative terminal of the next—and verify the entire chain from the first to the last battery, noting any open ends.
Compare your labeled map and photos carefully before removing any cables or batteries. This detailed documentation will prevent guesswork during reassembly, allowing you to restore the original wiring order precisely. Taking these steps saves time, reduces mistakes, and ensures your golf cart’s battery pack is reconnected correctly.
Safely Disconnect and Remove the Old Golf Cart Batteries
To safely disconnect and remove the old golf cart batteries, start by turning off the key, setting the parking brake, placing the cart in neutral, and chocking the wheels. If your cart has a tow mode, switch it on to avoid unintended movement. Before handling the batteries, put on safety goggles and chemical-resistant gloves, work in a well-ventilated area, and remove all jewelry to prevent contact with corrosive materials. Keep your tools organized, especially your insulated wrench, to avoid accidental shorts by ensuring it never touches metal surfaces during the process. Using a top load tester can help verify battery health before committing to a full replacement. Once you are certain a replacement is needed, consider what type of tread pattern will best suit your terrain, as yamaha golf cart tires are designed for different surfaces. Additionally, upgrading to a street legal configuration may require ensuring your battery system meets specific safety and performance regulations.
Begin by disconnecting the cables in the correct order: first, loosen and remove the negative cable using an insulated wrench, and then do the same with the positive cable. Once disconnected, secure each cable to prevent it from accidentally contacting the terminal again. Next, release the battery hold-downs, which may include brackets, straps, or clamps. Carefully lift each battery straight up and out of its compartment, keeping it upright to prevent electrolyte spills. Place the batteries on a stable, nonconductive surface and keep them separated to avoid accidental contact between terminals. Finally, transport the old batteries for proper recycling, following local regulations.

Golf Cart Battery Lifting Strap: Work for ALL Trojan Golf Cart Batteries, for Yamaha, Club Car and EZGO. You will get 1 piece golf cart carrier strap

BATTERY CARRIERS ARE UNIVERSAL: The strap battery carriers are 14 inches in length and fit most golf cart batteries with carabiners on the top of the battery compartment.

【Heavy-Duty PVC & Steel Build】: This car battery carrier strap is made from high-strength PVC combined with reinforced steel, offering excellent load capacity and tear resistance. The sturdy construction maintains shape under pressure, making it a reliable battery lifting strap for repeated use.
Inspect and Clean the Battery Tray and Cables Before Installing
Start by removing the old batteries and examining the tray for corrosion, rust, cracks, or warping. Any signs of structural damage mean you should replace the tray before installing new batteries, as a solid foundation ensures the compartment operates smoothly. Check that all slides, roller bearings, and hold-downs are intact, not bent, missing, or damaged. Sweep out any debris, then neutralize acid residue with a baking soda solution, scrub the tray thoroughly, rinse with water, and dry completely to prevent future corrosion. Use a multimeter set to DC voltage to test each battery before removal to confirm which ones need replacing. Unlike gas models, electric carts rely entirely on battery power, so a clean and stable tray is critical for performance. When choosing a transport method, ensure your truck ramp setup can handle the weight of a full golf cart without flexing. On public roads, Florida law requires such carts to meet specific safety equipment and speed restrictions.
Next, inspect every cable for cracking, fraying, or melting. Look for green or crusty corrosion on lugs and connectors, which can impede proper electrical contact. Clean cable ends with a wire brush until the metal is shiny. Tighten all connections firmly but be careful not to overtighten and damage the terminals. Replace any damaged cables to avoid poor contact or electrical issues. After cleaning, apply dielectric grease to the cable ends and connectors to slow future corrosion buildup.
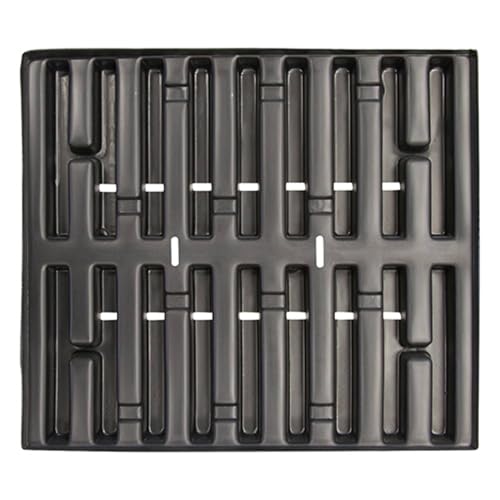
30-DAY RETURN POLICY/1-YEAR WARRANTY: If your order arrives and it’s not exactly what you want, you may return it within 30 days for a refund. We know that people sometimes order a part and then discover it’s not exactly the one they need for the repair. We understand and want to work with you. Just make sure the item is in its original packaging and in good condition free of damage. Outside of 30-days, we will replace it anytime within one year of your order.

Fitment: This Battery Tray compatible with 1994-2013 EZGO TXT/MEDALIST Golf Cart. Note: Will also compatible with other EZGO models that utilize the same 6x 6 volt battery configuration.

Vehicle Compatibility: Compatible With all 1994-Up TXT and MEDALIST Models. It will also work With other EZGO models with the same 6 x 6-volt battery set.
Install the New Golf Cart Batteries in the Correct Series Order
Once the battery tray is clean and all cables have been inspected, position each new battery in the tray. Begin wiring the batteries in series by connecting the first interconnect cable from a negative terminal on the first battery to the positive terminal on the second battery. Continue this pattern, connecting negative to positive terminals across all batteries in the bank. This series wiring configuration ensures the total voltage adds up correctly for your cart’s system. Unlike a golf car that may come with a built-in battery management system, a standard golf cart requires careful manual wiring to achieve the same result. For optimal performance, consider reviewing comparisons of top lithium golf carts that offer integrated battery management for easier maintenance.
Follow safety precautions by wearing gloves and avoiding metal tools that could bridge terminals. Double-check each connection to confirm it runs from positive to negative and is not reversed. Leave the positive terminal of the first battery and the negative terminal of the last battery open; these will connect to the main power leads of your golf cart. Keep jumper cables short and direct, and tighten terminals securely but without overtightening. Before proceeding, verify that the total voltage of the battery bank matches your vehicle’s requirements. To ensure full compliance, check if your cart also requires street legal upgrades like lights and mirrors.

Effortless Hill Climbing: The 38.4V lithium golf cart battery delivers a 2C discharge rate, providing 100A continuous discharge and 150A peak current(30s). Climb hills effortlessly, take your golf game to the next level with reliable performance

[Compatible Models]: Our golf cart battery cables wiring kit is specially designed for 36 & 48V 1994-up EZGO TXT cart models

【ULTRA HIGH PERFORMANCE - CLASS A BATTERY】: LOSSIGY 36V100AH Lithium Battery Golf Cart is made of class A chip, equipped with 43.8V25A smart charger, 9 in1 battery monitor, built-in 200A BMS, 3840W Powerful, 1000A peak current. IP65 waterproof. Preferred item for golf cars, trolling motors.
Test Your Cart and Charge the New Golf Cart Batteries Fully
After installing your new golf cart batteries, you must fully charge the pack before testing. This step is crucial because skipping it can lead to misleading voltage readings. Allow the charger to complete its full cycle—smart chargers will automatically shut off once finished, which helps prevent overcharging the batteries. After charging, wait at least 30 to 60 minutes to reduce surface charge, which can give an inaccurate picture of the batteries’ true state. If you need to replace other components, you can find top Club Car parts reviewed and compared online.
Use a multimeter set to DC voltage to check the voltage across your pack’s main terminals. For a 48V pack, a healthy reading should be between 50.9 and 51.5 volts; for a 36V pack, about 38.2 volts. Check each individual battery as well—6V batteries should read close to 6.37 volts when at rest. These voltages are reliable indicators of the batteries’ capacity and overall health. If you are looking for even more performance, you can explore speed boost tips to upgrade your cart’s controller or motor.
Next, conduct a load test by applying a 75–100 amp load for 10 to 15 seconds. A good battery will maintain stable voltage without sharp drops. After the load test, drive the cart to observe its acceleration and ability to climb hills, confirming the batteries’ real-world performance. Make sure your charger matches the new battery pack’s voltage and capacity; using an incompatible charger can prevent the batteries from reaching a full charge, affecting future performance. Record these baseline measurements for ongoing maintenance and comparison.
Properly Dispose of Old Lead-Acid Golf Cart Batteries
To properly dispose of your old lead-acid golf cart batteries, you should take them to an authorized recycling center, return them to the retailer where you purchased new batteries, or drop them off at a household hazardous waste facility. These batteries contain up to 18 pounds of lead and corrosive sulfuric acid, so it is crucial to handle them carefully. Keep the batteries upright and intact during transport to prevent spills or leaks. If the batteries are damaged, store them in a sealed, compatible container to contain any leaks. Never abandon or dispose of the batteries illegally, as improper disposal can result in environmental harm and legal penalties. Recycling these batteries recovers valuable lead resources for new batteries and prevents hazardous materials from contaminating soil and water, ensuring compliance with state and federal regulations. When choosing a replacement, selecting a reputable brand known for build quality and parts availability can simplify future maintenance. Upgrading to high-performance Yamaha parts can enhance your golf cart’s efficiency after a battery replacement. For specific guidance on finding a drop-off location, consult a local recycling directory or contact your municipality for approved facilities.
Troubleshoot Common Post-Installation Issues With Golf Cart Batteries
Even when you’ve carefully installed new batteries, several common post-installation issues can arise. First, thoroughly examine every battery connection. Loose or incorrectly reversed cables can cause intermittent power loss, hot terminals, or unexpected shutdowns. Tighten all connections and look for any nicks or corrosion that might interfere with conductivity. If your golf cart turns on but doesn’t run smoothly, check the system compatibility—ensure the pack voltage aligns with the manufacturer’s specifications and that the wiring configuration matches the cart’s requirements. Charging problems are also frequent; confirm the charger is properly plugged in and that the receptacle has no bent pins. Use a voltmeter to verify the charger’s output voltage, and remember that before taking readings, you should wear safety goggles to protect against acid or sparks. For flooded batteries, inspect each cell for corrosion or low fluid levels, topping off or replacing batteries that show significantly reduced fluid. Finally, double-check the wiring diagram to avoid misplacing ground or signal wires, which can lead to poor performance or potential damage. Systematic troubleshooting of these aspects will help restore your golf cart’s reliable operation. Also, remember that realistic lifespan figures for 48V batteries typically range from 4 to 6 years with proper maintenance. Remember that final tightening is often required after initial setup to prevent loose cable connections from developing.

【What You Get:】In this set, we offer 10types 80Pcs of AWG 2 4 6 8 10/12 ring terminals copper lugs battery cable ends open end termination ring terminals with 80 Pcs 3:1 Dual Wall Adhesive Heat Shrink Tubing for your work which meet your different needs.
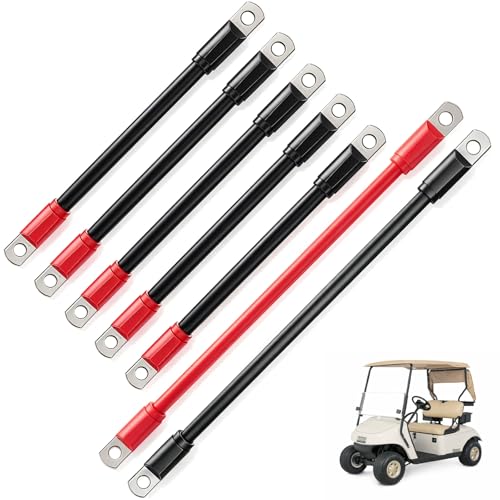
COMPATIBLE MODELS: Golf cart battery cables fits EZGO 1994-up models

[Compatible Models]: Golf cart battery cables compatible with EZGO TXT 1994-up, check your cart and make sure your model is fit