Ever wondered how to swap your golf cart’s old lead-acid battery for a reliable lithium one? Making the switch can boost your cart’s performance and lifespan, but you need to get the installation right.
In this guide, you’ll learn the step-by-step process to safely and effectively install a lithium battery, so your cart runs smoother and longer.
Is Your Golf Cart Ready for a Lithium Battery?
You must verify your golf cart’s electrical system supports a lithium battery before making the switch. Start by matching the voltage; for example, a 48V lithium pack cannot be installed in a 36V system without causing low-voltage cutoffs or damaging the motor. Compatibility depends on your controller tolerating the lithium voltage range—many older carts may not. After confirming voltage compatibility, check that your motor can handle the higher instantaneous torque that top lithium golf carts typically deliver for improved performance. Next, check charger compatibility. Lithium batteries require a dedicated lithium charger, as using a lead-acid charger can damage the battery and compromise safety. To further protect your investment, consider consulting top covers for golf carts to shield the new battery from weather exposure. When selecting a replacement, reviewing a lithium battery buyer’s guide can help you compare top options and choose the best fit.
Also, ensure the Battery Management System (BMS) supports your cart’s setup. The BMS prevents overloads, maintains battery health, and protects your investment. Finally, measure your battery bay dimensions to confirm the lithium pack will fit properly. Not all models are designed for direct replacements, so physical size and mounting options are crucial before proceeding.
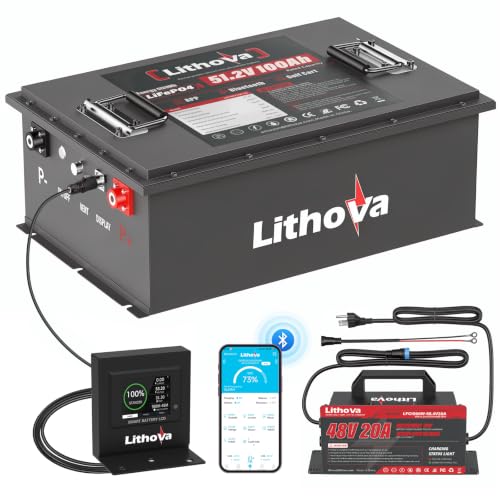
Get Rid of Lead Acid Batteries Now: Revolutionize your golf cart with Lithova 48V golf cart lithium conversion kit! This 48V lithium battery directly replaces 6-8V 100Ah heavy lead-acid batteries in one simple installation. Enjoy 74% weight reduction, 60% smaller size, and extended 50-mile range (effortless 7-9 Rounds of 18-hole courses). Lasts 8x longer than lead-acid batteries, Up to 15000 deep cycles ensure maintenance-free performance and long-term reliability.

Born for 48V Golf Cart: Special designed for 48v golf cart industry, OGRPHY 48v lithium golf cart battery is compatible with golf cart controllers of all major brands on the market. Built in premium grade A prismatic LiFePO4 cells(UL certified), this 48v battery has better durability & safety. Over 5kWh capacity equals 8pcs 12V 100AH lead acid batteries. Max 10.24kW continuous power & peak 51.2kW power (50% more powerful than standard lithium batteries) to conquer hills/rough terrain effortlessly.
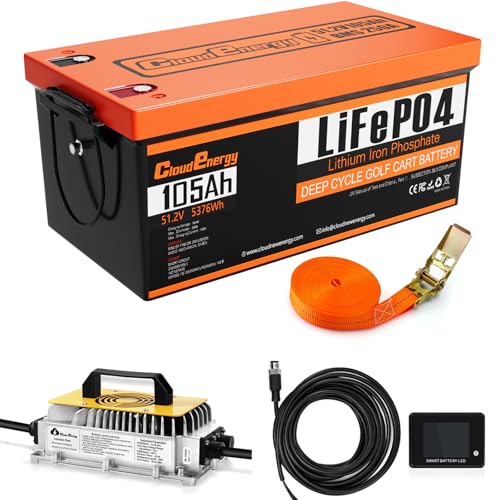
24 Hours Customer Service: Cloudenergy provides technical support and online customer service with fast feedback within 24 hours for any product-related issues or questions
How to Remove the Old Lead-Acid Battery Bank
To remove the old lead-acid battery bank safely, start by turning off the power key, engaging the parking brake, and switching the Tow/Run switch to Tow. This prevents any accidental electrical engagement. Next, remove the key from the ignition to ensure the system is completely powered down. Disconnect the main negative cable from the battery pack first, using insulated tools to avoid electrical shocks. It’s helpful to take photos of the wiring before disconnecting for reference during reassembly, and label all cables and note series jumpers to keep track of the connections. For context, the speed of your new setup will depend on factors like motor voltage and drivetrain, with typical 36v golf cart speeds ranging from 12 to 14 mph. Ensure your replacement battery matches the quality and performance needs of your cart for optimal reliability. Upgrading to a lithium battery also allows for better sound system integration with compatible accessories.
Carefully disconnect external connections, including the main fuse, with insulated tools to prevent short circuits. Loosen and remove any hold-down brackets or straps securing the batteries in place. Use non-metallic tools like a nylon ratchet wrench to remove the hold-down hardware and avoid accidental short circuits. Because lead-acid batteries are heavy, lift each one vertically using sturdy straps or handles to avoid injury. Place the batteries on a stable surface away from the cart to prevent tipping or damage.
For environmentally responsible disposal, take the old batteries to a recycling center or an authorized disposal site. Never throw lead-acid batteries in regular trash, as they contain hazardous materials that must be managed properly to avoid environmental contamination.

[10 Years Lifetime and 5000+ Deep Cycles] OGRPHY 48 volt lithium battery is made of new grade A cells with UL certification. 10 years lifetime and 5000+ deep cycles is not just a slogan under instructions on the product manual.

【ULTRA HIGH PERFORMANCE - CLASS A BATTERY】: LOSSIGY 36V100AH Lithium Battery Golf Cart is made of class A chip, equipped with 43.8V25A smart charger, 9 in1 battery monitor, built-in 200A BMS, 3840W Powerful, 1000A peak current. IP65 waterproof. Preferred item for golf cars, trolling motors.

【ALL-IN-ONE LITHIUM UPGRADE KIT】: Includes everything for a hassle-free installation: 48V 102Ah LiFePO4 battery, charger, LCD display with stand, and straps. Built-in DC-DC converter powers 12V accessories (lights, horn, stereo)—no voltage reducer needed.
Clean the Battery Tray for a Secure Fit
Cleaning the battery tray is essential before installing your lithium battery to ensure a secure fit. Start by vacuuming out dust, leaves, and caked grime from the tray, paying special attention to edges and corners where acid residue tends to accumulate. Remove any old padding or loose fasteners that could prevent the battery from sitting flat.
Next, neutralize corrosion by applying a baking soda and water solution. Let it foam and fizz until the reaction subsides. Use a wire brush for heavy buildup, but be cautious not to damage protective coatings. Rinse the tray with minimal water to prevent pooling, then dry thoroughly with a microfiber cloth. Any remaining moisture can lead to insulation issues or shorts. Unlike gas models that require frequent engine maintenance, electric systems benefit from lower running costs and simpler upkeep.
Finally, inspect the tray for rust or pitting to confirm it is flat and debris-free. Check nearby cables for signs of corrosion as well. For buyers considering a full upgrade, reviews on top battery chargers can help ensure you pair your new lithium battery with compatible charging equipment. A clean, rust-free tray helps ensure the lithium battery sits securely and allows proper ventilation for your system. Selecting a 24 volt battery charger with the right voltage and amperage rating is crucial for lithium battery longevity.
Install the Lithium Battery: Wiring Order and Torque Specs
To install the lithium battery correctly, follow the proper wiring sequence and tighten terminals to the specified torque. Always refer to your manufacturer’s wiring diagrams first, as they are essential for safe and correct installation. Connect the main cables positive-to-positive and negative-to-negative as a standard procedure. When dealing with multi-cable terminals, connect the pack positive first, then attach accessory cables. Always wear safety glasses and use insulated tools to prevent accidental short circuits during the battery hookup process. Upgrading your battery system can also be complemented with high-quality seat covers to protect your cart’s interior during installation.
Ensure series wiring matches your cart’s voltage by verifying each connection against the recommended layout before tightening. Torque specifications vary: many lithium terminals require 4 to 6 Newton-meters or 70 to 90 inch-pounds for M8 studs. Some systems call for 8 to 12 Newton-meters or around 10 foot-pounds. Over-tightening can strip threads and cause damage, while under-tightening leads to arcing and poor connections. Use a calibrated torque wrench to apply the correct torque—never guess. For optimal performance, consider pairing your new battery with a compatible top controller to ensure smooth voltage regulation and charging.
During final hookup, connect the positive cable before the negative. Before energizing, double-check each run against the wiring diagram to ensure proper assembly. Following the correct wiring order and torque specifications helps ensure a reliable power-up without error codes or safety issues.

40lb +/- 5 torsion, the best value to ensures that the clubs head and adapter screw are securely attached (even for high swingspeed:120+) without being over-tightened

DIMENSIONS: 9.20 inches L x 4.8 inches W x 2.5 inches H

PRECISION - Ships pre-calibrated to +/- 4% accuracy and ready to use. Include calibration certificate with traceable serial number.
Connect the Charger and Charging Port for Lithium
Start by selecting a lithium-specific charger with a CC/CV (Constant Current/Constant Voltage) profile that matches your battery pack voltage. Proper compatibility ensures safe and efficient charging. After verifying your charger’s specifications, wire the charge receptacle to the pack’s main positive and negative terminals, maintaining correct polarity—red wire to positive, black wire to negative. Reversing polarity can damage the charger and the battery pack.
Install a 30A inline fuse on the positive charge port lead to protect against overcurrent. Confirm that the connector style of your port matches your charger plug to ensure a secure connection. Mount the port firmly in a location that allows easy access and prevents accidental disconnection. Always follow proper charging practices to extend battery life and avoid overheating. For example, using a sturdy loading ramp can help safely move the battery during installation.
Before connecting to AC power, set your vehicle to TOW mode to prevent unintended operation. This is because the golf cart controller can misinterpret the current flow during charging and activate the motor if the vehicle is not in TOW mode. Fully seat the charger plug into the receptacle, then plug into AC power. Always verify the polarity and voltage with a voltmeter before making a connection to avoid damaging components.
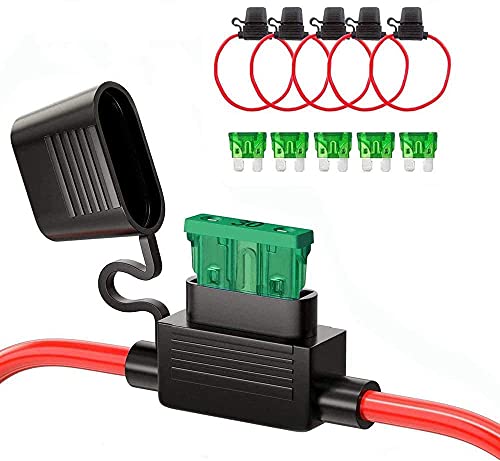
Heavy duty 12AWG wire, better protection to the circuit.

Material: gold-plated metal, polycarbonate transparent PC shell

Supplied with two 4 inch wire leads of 16 gauge black wire
Why You Must Connect the BMS and Monitoring Leads
Connecting the BMS and its monitoring leads is essential because, without them, your lithium pack cannot enforce cell-level protection. The BMS relies on these leads to measure voltage, temperature, and current in each individual cell or cell group. This detailed monitoring helps prevent overcharge, over-discharge, and thermal runaway, ensuring safe operation. During charging, the BMS uses these leads to disconnect the charging path immediately if it detects a fault. Properly connected monitoring leads also enable early detection of cell imbalances, allowing the BMS to trigger balancing and maintain voltage uniformity across all cells. Loose or incorrectly connected leads break this critical protection system, exposing the pack to potential damage. Especially in vibration-prone vehicles like golf carts, maintaining daisy-chain continuity is vital. Using a durable EZGO cover protects the BMS and leads from weather and debris during storage. Accurate, secure connections of these leads directly influence your battery’s safety, performance, and lifespan. When choosing a lithium pack, you can review the top lithium batteries listed in a buyer’s guide to ensure your BMS leads are compatible with a trusted, high-quality system.
Adding a Voltage Reducer for 12V Accessories
Choose a reducer rated for your total accessory load—most lighting and audio setups use models rated for 20A, 25A, or 30A. Wire the input through a fuse to your pack’s positive and negative terminals to protect against shorts. Connect the output into a fused 12V distribution panel to ensure a clean power distribution. Mount the reducer in a dry, well-ventilated spot to prevent overheating. Verify its input voltage range matches your lithium pack’s nominal and fully charged voltage levels to ensure proper operation. For added safety, consider a key-switch activated model that keeps accessories off when your cart is not in use. When selecting a lithium battery for your EZGO, reviewing top golf cart batteries can help ensure compatibility with your reducer’s input range. Many reducers are designed to integrate seamlessly with golf cart enclosures that protect the system from weather exposure. For a complete setup, selecting a proper windshield can also shield your reducer and accessories from wind and debris during operation.
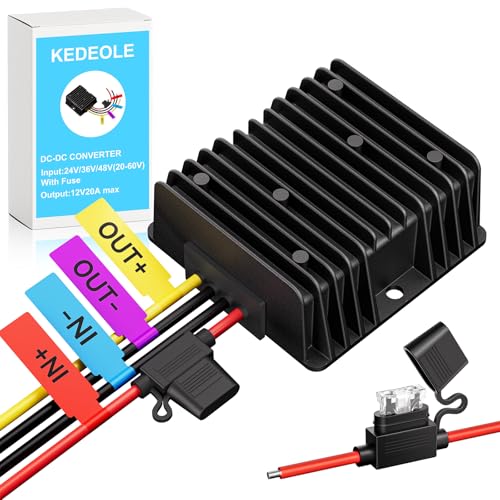
【Efficient 24V/36V/48V to 12V Converter for Golf Carts】 Step down golf cart voltage reducersystems (20V-60V input → 12V 20A 240W output) with stable performance.

DC-DC 72V 60V 48V volt voltage to 12V Step Down Voltage Reducer regulator 300W 25A for Scooters & Bicycles Golf cart

Input Voltage Range: DC 20V-60V;(Rated Voltage:DC 24V/36V/48V)
First Power-Up: How to Test Voltage Safely
Before powering up the golf cart, you need to test the lithium pack’s voltage safely. First, disconnect the charger and turn the cart key off. Wear gloves and safety glasses, and keep metal tools away from the terminals to avoid accidental shorts. Set your digital multimeter to DC volts, choosing a range above your expected voltage—such as 20V for a 12V battery. Allow the pack to rest for at least one hour, but overnight is preferable. This rest period helps dissipate surface charge, ensuring more accurate and stable voltage readings.
A fully charged 12V LiFePO4 battery typically reads around 13.2 to 13.6 volts, while a 48V pack measures roughly 53 to 54.6 volts. Always compare your readings to the manufacturer’s specifications for your specific pack, not lead-acid battery benchmarks. If any voltage falls outside the expected range, stop testing, recheck your connections, and investigate further. Recording each measurement creates a baseline useful for future troubleshooting.
Take Your Golf Cart for a Test Drive After the Conversion
Once your lithium pack passes its initial voltage check, you can proceed with a test drive of your converted golf cart. Begin on a flat, low-traffic route to easily identify any issues. Use gentle acceleration to verify that the throttle responds smoothly and that the cart pulls evenly without hesitation. During the drive, periodically recheck the battery mounting and voltage regulation to ensure everything stays secure and operational. Listen for any abnormal sounds that could indicate mechanical or electrical problems.
Test the braking system at low speed first, then gradually increase to normal driving speeds. This helps confirm that your braking response is consistent and safe. Once basic drivability is confirmed, ascend a short, mild incline to assess power delivery under load. Watch for signs of power loss or hesitation as you climb.
After completing the test drive, inspect the motor and battery compartment temperatures for any unusual heat or odors, which could indicate overheating. Additionally, at high speeds keep the motor working continuously, as a high-speed run can generate significant heat and motor whistling. Examine all terminals and cables for looseness or signs of wear. Confirm that all installation points remain stable after encountering bumps or rough terrain. If any adjustments are made, repeat the test drive to ensure everything functions correctly.
Final Checks for Maximum Lithium Battery Life
To maximize your lithium battery’s lifespan, perform a battery calibration every 3 to 6 months. Fully charge the pack, then discharge it to a safe cutoff point, and recharge. This process helps the battery management system accurately estimate the state of charge, preventing premature shutdowns. After each use, recharge the battery and keep the charge level above 20 percent to avoid deep discharges that can harm the battery. For long-term storage, aim for a charge level between 40 and 60 percent. Temperature management is essential: store the battery in a cool, dry place between 10°C and 25°C, and never charge when the temperature drops below 0°C, as this can trigger protection system blocks. Confirm that your charger’s cutoff voltage is set to between 3.55 and 3.65 volts per cell. Lastly, tighten all terminal connections to ensure consistent performance and extend your battery’s life.