Wondering how to properly wire your golf cart batteries? The key is connecting them in series to increase the voltage to match your motor’s needs—parallel wiring won’t do the job.
By the end of this, you’ll know the safe and effective way to set up your battery pack without costly mistakes. Keep reading to learn the full process step by step.
Why Golf Cart Batteries Must Be Wired in Series, Not Parallel
Wiring golf cart batteries in series is essential because it increases the overall voltage to meet the motor’s requirements. You do this by connecting each battery’s positive terminal to the next battery’s negative terminal, forming a continuous chain. This setup adds the voltage of each battery together, resulting in a 36V, 48V, or 72V system, depending on the number of batteries used. Without this increase in voltage, your golf cart simply won’t operate. Parallel wiring, on the other hand, increases capacity but keeps voltage the same, which does not satisfy the motor’s needs. Proper series wiring ensures that the current flows consistently through the entire string, supporting efficient and reliable operation. Just as correct tire pressure optimizes grip and ride quality, maintaining proper voltage through series wiring is essential for peak performance. For those seeking affordable rides, choosing a setup with reliable batteries can significantly reduce long-term costs, and reviewing a guide to quality and performance helps identify the best long-lasting options. Regular inspection of connections, adherence to safety precautions such as wearing gloves and eye protection, and avoiding bridging terminals with tools are critical for maintenance. The open terminals at the ends of the series serve as key points for main cable connections.

Universal Compatibility – Fits Club Car DS, EZGO TXT/RXV, and Yamaha golf carts with a 9-pin plug. NOT compatible with Club Car Precedent.

[Compatible Models]: Our golf cart battery cables wiring kit is specially designed for 36 & 48V 1994-up EZGO TXT cart models

【Sturdy Durable】The control wiring harness is made of premium copper core and the insulation layer is made of fluorine plastic, serves as the central nervous system of your golf cart, connecting various electrical components and enabling them to work together efficiently, ensuring smooth operation and reliable performance.
How to Disconnect and Remove Your Old Battery Bank Safely
To disconnect and remove your old battery bank safely, start by turning off the golf cart, removing the key, and setting it to Tow mode if available. Disconnect the charger, engage the parking brake, and chock the wheels to prevent movement. Always wear gloves and safety goggles to protect against acid spills, sparks, and short circuits. Use an insulated wrench when loosening terminals to prevent accidental electric shorts.
Open the battery compartment to locate the main pack cables. Disconnect the negative cable first to reduce the risk of sparks, then disconnect the positive cable. Keep the cables separated to prevent contact with each other or metal surfaces. Next, remove any series jumper cables one at a time, remembering their original configuration for reinstallation. Ensure the battery tops are clean and dry before handling, as conductive debris can cause stray current paths. On a golf course, mastering safe driving techniques can help prevent common hazards like sharp turns or steep hills.
Release the hold-downs securing each battery and inspect for corrosion or damage. Carefully lift each battery, keeping it upright because tipped or dropped batteries can spill acid or get damaged. Place them on a nonconductive surface such as a wooden pallet or rubber mat. Refer to the step-by-step walkthrough for additional guidance on handling the battery bank. Store or transport the batteries in a secure container specifically designed for recycling or disposal.

Golf Cart Battery Lifting Strap: Work for ALL Trojan Golf Cart Batteries, for Yamaha, Club Car and EZGO. You will get 1 piece golf cart carrier strap

【Applicable Models】Golf cart battery hold down plate kit fits all for EZGO 1994-up Gas and Electric Golf Cart.

Fits Club Car DS, Precedent, Tempo, and Onward models in both 36V and 48V configurations. Verify your cart's voltage and cable length before ordering.
How to Wire Batteries in Series for Any Voltage
To wire batteries in series, connect the negative terminal of the first battery to the positive terminal of the next. Continue this pattern along the entire bank, ensuring all connections are consistent throughout. For example, six 6-volt batteries wired in series will produce 36 volts, while four 12-volt batteries will deliver 48 volts. After completing all connections, use a multimeter to verify that the total voltage matches your cart’s specifications. Proper series wiring also affects your charging protocols, so confirm that your charger is compatible with the final pack voltage. Make sure terminal connections are tight enough to prevent arcing but not overtightened to avoid damaging the terminals or cables. For comparison, gas-powered golf carts often require different maintenance and setup considerations. Additionally, if you plan to operate your cart on public roads, ensure you follow Florida golf cart laws regarding equipment and licensing. A durable utility bed can be a valuable addition for hauling tools or batteries during transport.

4 AWG battery cables fits for EZGO TXT 1994-UP 36V/48V Golf Carts.
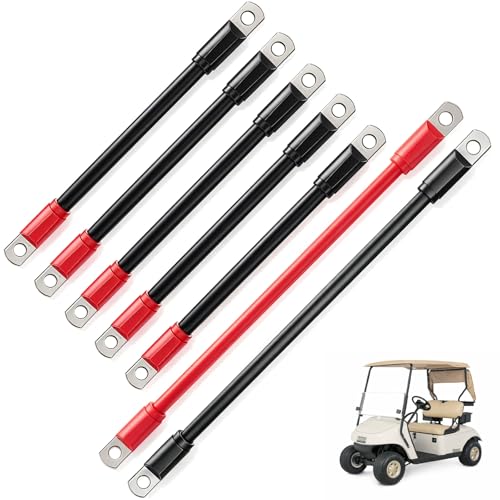
COMPATIBLE MODELS: Golf cart battery cables fits EZGO 1994-up models

[4 WAY BATTERY TERMINAL] Made of high-quality brass and steel material which is corrosion resistant with excellent electrical conductivity that can reduce voltage distortion and transmission loss. And it has 4 ports for multiple cable connections, wiring is easy and convenient to modify.
Where to Attach the Main Cables in a Golf Cart Battery Wiring Setup
The main cables attach to the two free terminals at opposite ends of the battery chain. The positive cable connects to the free positive terminal on the first battery in the series, while the negative cable attaches to the free negative terminal on the last battery. Proper routing of these cables is crucial to prevent contact with the frame or other terminals, which could cause shorts or sparks. Always ensure the cable ends are clean and fully seated before tightening the terminal nuts securely. It’s best practice to connect the negative main cable first, followed by the positive, to reduce the risk of sparks if a tool accidentally touches the frame. Confirm the terminal labels on your cart’s controller or solenoid before making these connections to ensure correct wiring. Choosing a lithium battery upgrade can significantly improve performance and longevity compared to traditional lead-acid options, as detailed in reviews of top lithium golf carts. For optimal protection against weather and debris, consider using a fitted cover designed specifically for your cart model. For an enhanced audio experience while working, consider upgrading to top magnetic speakers that mount securely on the frame.

The battery terminal connector is made of high-quality pure copper material, which is resistant to high temperature and corrosion and achieves maximum conductivity.

[ Package Includes ] 10 pcs 4 gauge (AWG), 3/8" (M10) stud battery cable lugs with 10 pcs 3:1 marine grade dual wall adhesive heat shrink tubes

PREMIUM MATERIAL: HOUSUN battery cable ends are made of 100% copper with tinned surface for corrosion protection
How to Verify Your Wiring With a Multimeter
Start your voltage verification by testing each battery individually with your multimeter set to DC volts. A healthy 12V battery should read between 12.6 and 13.2 volts. Lower readings suggest the battery is discharged or deteriorating. Then, test the entire pack—expect around 38 volts for a 36V system or approximately 50 volts for a 48V system. Comparing the sum of individual battery readings to the full pack voltage helps identify wiring issues. If the pack voltage is significantly lower than the combined individual readings, you might have wiring errors or weak connections. Scrape corrosion if contact quality is compromised to ensure accurate readings. If you see a negative reading, it indicates the probes are reversed—switch them and retest. Consistent voltage across all series-connected batteries confirms proper wiring. Any unstable readings or fluctuations often point to corrosion, loose connections, or contact issues in the wiring. For example, pairing your battery check with a clean LED light kit installation can prevent future electrical interference.
Common Golf Cart Battery Wiring Mistakes That Can Damage Your Cart
Connecting your golf cart batteries correctly is crucial to prevent damage. Always connect positive terminals to positive terminals and negative to negative in series. Reversing polarity can fry controllers and other electronics instantly, so double-check your connections before powering up. Skipping a battery in the chain reduces voltage and leaves your cart underpowered or dead. Tighten terminals securely; loose connections create arcs, melt lugs, and pose fire risks. Clean all terminals regularly to remove corrosion, which increases resistance and causes overheating and efficiency loss. Use cables that are appropriately sized—don’t rely on automotive cables, as they may be too thin and lead to voltage drops. Additionally, route wiring carefully to avoid abrasion against the frame, which can create shorts and melt wiring insulation. Proper wiring practices protect your electronics and ensure smooth, reliable power delivery.

[Compatible Models]: Our heavy duty golf cart battery cables are specially designed for 36 & 48V 1994-up Club Car DS and Precedent cart models
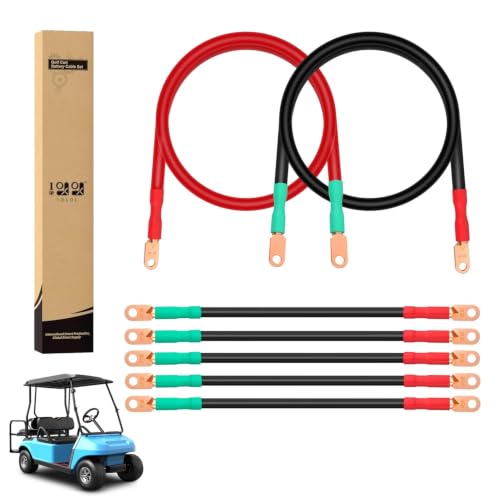
【Fit for 1994-Up Club Car 36V&48V Models】7-piece golf cart battery cable set is designed for 1994-Up Club Car DS & Precedent 36 volt & 48 volt models. Ideal for replacing worn or corroded cables to restore reliable power delivery.

[Compatible Models]: Our 4 gauge heavy duty golf cart battery cables are specially designed for Club Car DS and Precedent 1994-up 36&48 volt cart models
How to Equalize Charging and Water Levels for Longer Battery Life
Equalizing your flooded lead-acid golf cart batteries every 4 to 6 weeks helps rebalance cell charge and reduces stratification. However, you must first complete a full normal charge to prevent damage. Set your charger to 15.0 to 16.2 volts for a six-cell battery, then allow it to charge for 1 to 3 hours until the specific gravity stabilizes. During this process, gassing is normal and helps mix the electrolyte, so expect some bubbling. To avoid overcharging, always follow the typical charge times for your specific battery pack voltage and chemistry. Before equalizing, check the electrolyte levels and ensure they are topped off with distilled water to about a quarter inch above the plates. Never fill below this level, and avoid overfilling to prevent spillage due to thermal expansion during charging. Always water the batteries after a complete charge, not beforehand, to ensure accurate electrolyte levels. Track the specific gravity of each cell monthly with a hydrometer. A difference over 0.030 indicates that equalization is needed. Choosing the right charger is essential, as a 24 volt battery charger designed for golf carts can provide the precise voltage regulation needed for safe equalization. Regular watering combined with routine equalization minimizes sulfation buildup and stratification, helping to extend your battery’s lifespan. You’ll notice more consistent performance and fewer replacements over time. For a golf cart used on public roads, proper battery maintenance directly supports the consistent electrical output required for street legal compliance.