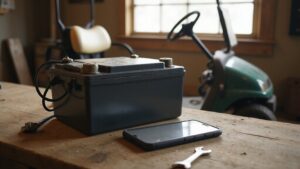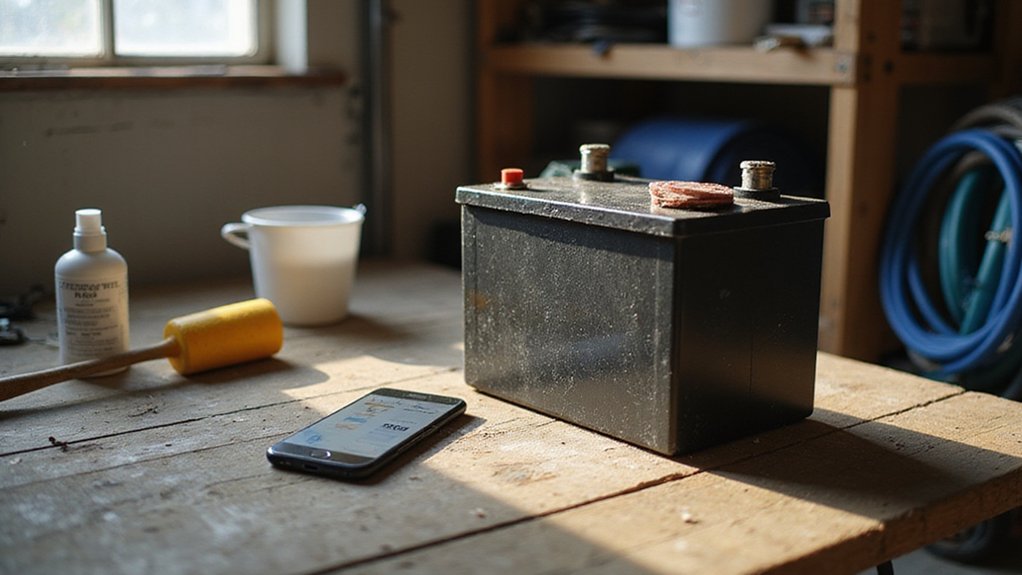
If your golf cart’s battery isn’t holding a charge or shows signs of weakness, refurbishing it might be the answer.
Restoring a battery involves careful inspection, cleaning, and sometimes adding solutions to reverse sulfation. With a few steps, you can improve your battery’s performance and extend its lifespan.
Keep reading to learn how to effectively bring your golf cart battery back to life.
Inspect for Cracks and Electrolyte Levels First
Inspecting your golf cart batteries for cracks and electrolyte levels is essential before handling any tools or chargers. Start by checking each battery case thoroughly for cracks, bulges, leaks, or swelling. Any visible damage indicates structural failure and warrants immediate replacement—do not ignore these signs. Look closely for wet spots, staining, or white streaks around the case, as these often point to electrolyte leaks or broken seals. Heavy corrosion on terminals or cables also suggests leaking cells and should prompt further inspection. Address any visible case damage promptly, as it cannot be safely repaired and requires replacing the affected battery. If you need to transport a damaged battery, using a dedicated golf cart trailer can help secure it safely during replacement.
Next, check the electrolyte levels in every cell of your flooded lead-acid batteries. Remove vent caps carefully and ensure the fluid level covers the internal plates completely. If the plates are exposed, the battery may be damaged beyond repair. Maintain levels within the recommended minimum and maximum fill lines, ideally about two-thirds of the way up the cell. Use only distilled water to top off low levels—tap water can introduce impurities and harm the battery. Record any abnormalities such as low electrolyte levels, leaks, or damaged cases; tracking these signs can help gauge your battery’s health over time. Additionally, always wear safety goggles and gloves when inspecting electrolyte levels to protect against acid splashes. Carefully monitor for swollen battery cases during inspection, as swelling often indicates internal short circuits or overcharging.
Safely Disconnect Your Golf Cart Battery Pack
To safely disconnect your golf cart battery pack, follow these steps:
Start by disabling the cart completely. Turn the key to the off position, set it to Tow mode, and apply the parking brake. Then, put the forward/reverse control in Neutral and chock the wheels to prevent any movement. Ensure you have an insulated wrench set on hand to avoid accidental sparks during the process.
For battery safety, wear insulated gloves and safety glasses, and ensure you are working in a well-ventilated area to avoid accumulation of flammable gases. For optimal performance, choose replacement batteries that offer high quality and value.
Begin removing the cables in order, starting with the main negative cable. Loosen it first and move it away from the terminal post to avoid short circuits. Next, disconnect the main positive cable, followed by any jumper cables. Keep all loose ends from touching metal or other terminals. Place all disconnected cables in a safe, non-conductive area.
After all cables are removed, allow the controller capacitors to discharge fully, which can take several minutes. Confirm that no cables are swinging back and touching any post. Once this is done, your battery pack is safely isolated.
Choosing the best replacement depends on your specific needs, such as lithium versus lead-acid batteries and required voltage.

This set of 3 gauge battery cables is designed for use on 48 volt Club Car Precedent golf carts (with six 8V batteries)

REACHES TIGHT BATTERY BOXES: Tighten and loosen lead-acid battery terminal bolts SAFELY with this insulated 10mm spanner. The slim open end reaches terminal and hold-down bolts where a socket or ratchet will not fit.
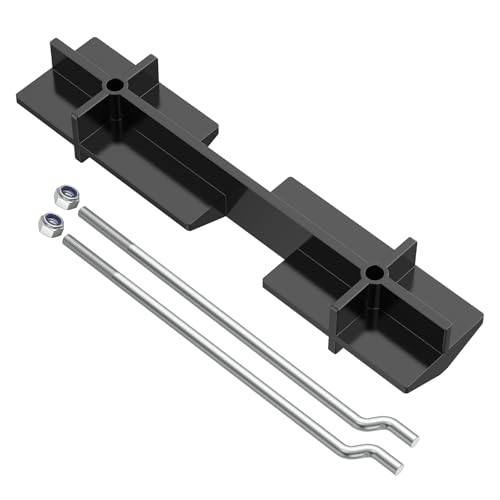
Fits EZGO 1994-up 36V electric golf cart
Clean Corrosion on Golf Cart Battery Terminals
Once you’ve safely disconnected the battery pack, you need to clean corrosion off the terminals to ensure good electrical contact. Begin by neutralizing any acidic buildup with a baking soda solution—mix one tablespoon of baking soda with one cup of water. Apply the solution directly to the corroded areas; you’ll see fizzing as the baking soda reacts with the acid. Use a brush to scrub stubborn residue until the metal appears bright, keeping the area damp to prevent airborne dust. Rinse thoroughly with clean water, being careful not to let any water enter vent caps or other openings. Dry everything completely—any remaining moisture can cause ongoing corrosion and weaken your connection. To help prevent future corrosion, apply a thin layer of petroleum jelly or dielectric grease to the terminals. This step creates a moisture-resistant barrier, reducing oxidation and maintaining solid electrical contact. For added protection, consider installing an extended roof to shield the battery compartment from rain and debris while parked outdoors. Regular inspection and cleaning of the terminals can help catch early corrosion buildup before it becomes a serious problem. Because corrosion causes resistance and poor conductivity, cleaning ensures reliable starts even in cold conditions. However, if the batteries are lithium-based, note that avoiding deep discharge is a critical habit that significantly extends usable lifespan. Upgrading to high-quality tires and rims can also reduce rolling resistance and improve overall vehicle efficiency.

Protects Electrical Connections And Wiring From Salt, Dirt And Corrosion

Secure Electrical Connections: Seal, lubricate and insulate to prevent various leaks or damage around any electrical connectors ensuring top performance and vehicle quality(Dieletric Breakdown 10KVA)

TRUSTED AMERICAN QUALITY SINCE 1931 – MORE GREASE FOR LESS: AGS has been manufacturing professional-grade automotive chemicals right here in the USA for over 90 years. At 4oz per can, you get 2–4x more dielectric grease than competing products at the same price — premium protection that doesn't cut corners.
Check and Fill Electrolyte Levels Before Refurbishing
Before refurbishing flooded lead-acid golf cart batteries, you must check and fill the electrolyte levels carefully. Always verify the electrolyte levels after a full charge to ensure accuracy and prevent overflow. Remove the vent cap labels from each cell; these labels indicate the correct fill wells. Use only distilled or deionized water—never tap water—since contaminants can alter the electrolyte chemistry and reduce battery lifespan. Fill each cell to about 1/8 inch below the fill well, making sure the plates are not exposed. If the plates are visible, add just enough water to cover them before charging. Avoid overfilling, as excess fluid dilutes the electrolyte and causes spillover. For safety, always wear protective gear like gloves and goggles to prevent contact with acidic electrolyte during this process. For optimal performance, consider pairing your refurbished battery with a voltage reducer to safely power your golf cart’s accessories. To maintain efficient operation, ensure your cart’s bag holders are securely attached for convenient transport of gear. Finally, securely replace the caps after filling each cell.
Mix an Epsom Salt Solution for Battery Cells
Mix an Epsom salt solution for your golf cart battery cells by dissolving magnesium sulfate in distilled water. To prepare, heat about 150°F of distilled water in a clean container. Gradually add Epsom salt while stirring until it no longer dissolves and the solution becomes clear with no visible crystals. A common ratio is 4 ounces of Epsom salt per quart of warm water, but ratios can vary. Be sure to avoid adding dry salt directly into the battery; instead, prepare just enough solution to cover the plates, roughly 1/8 cup per cell. This method aims to help restore sulfated lead-acid batteries, but always handle with care and use appropriate safety measures. While popular, testing suggests that commercial battery repair liquids often fail to deliver lasting results compared to simple Epsom salt treatments. After refurbishing, using a top 12 volt golf cart battery charger ensures the battery is properly reconditioned and maintained. Remember that Georgia regulations govern golf cart operation on public roads, which may limit where you can drive your refurbished golf cart.
Refill and Seal Battery Cells the Right Way
To refill and seal a flooded lead-acid battery cell properly, start by disconnecting the battery from any connected equipment. Wear eye protection and gloves in a well-ventilated area to protect yourself from corrosive fumes and splashes. Identify if your battery has removable vent caps—skip sealed units that don’t require refilling. Use a filler bottle to add distilled water slowly until the electrolyte covers the plates just below the fill ring. Avoid overfilling, as electrolyte expands during charging and can spill over, causing terminal corrosion and reducing capacity. After filling, securely reinstall each vent cap, making sure they seat evenly to prevent leaks. Clean around the cap area before replacing to keep debris out. If any caps are damaged, replace them. If your battery has a top cover, reattach it with minimal adhesive, ensuring venting paths remain open. Do not seal the top tightly unless the battery is designed to be airtight. For batteries where caps frequently blow off, consider fabricating an acrylic piece bolted onto the battery to hold caps down while still allowing gas to escape. Before finishing, inspect the battery for cracks or damage to prevent future issues. Always use distilled water instead of tap water to avoid introducing minerals that can shorten battery life. For additional protection, consider installing a weather-resistant enclosure to shield the battery from rain and debris during use. Secure the enclosure with durable hinge options that withstand vibration and exposure to harsh outdoor conditions.
Charge a Refurbished Golf Cart Battery Slowly
After refilling and sealing the cells, you should charge the refurbished golf cart battery slowly to ensure safe and effective recovery. Set your charger to a low current, ideally around C/10 to C/20 of your battery’s amp-hour rating. For example, if your battery is 100 amp-hours, use a current between 5 and 10 amps. This slow charging reduces heat buildup and stress on the plates, which directly extends Battery longevity. A slow charge is especially important after a deep discharge because the pack needs time to accept energy without damage. Expect the charging process to take longer than usual—possibly 10 to 14 hours—since internal resistance is higher in a refurbished pack. Prioritize Charging safety by monitoring the battery temperature regularly and ensuring proper ventilation in the charging area. If the process exceeds 14 hours without completion, check for cell imbalance or connection issues, as these can hinder proper charging. Always clean and tighten the terminals before starting to assure that the charger reads the correct voltage and can begin the slow charge cycle effectively. Proper terminal connection also helps prevent voltage reading errors that might cause premature cutoff or uneven charging. Before charging, always verify electrolyte levels are correct to prevent overheating and damage. If you are buying a used golf cart, verifying the battery’s ownership paperwork can help ensure the cart is not stolen and that you have clear title transfer documentation.

【15 Amp Rapid Charger/Lead-Acid】 EPOWREY 48 volt battery charger for Club Car golf carts with 3-pin round plug.This charger is designed as a one-piece plug, using a rubber cord that is more abrasion-resistant and heat-resistant than PVC cords, and have effective waterproofing advantage.

【48 Volt 15 Amp Golf Cart Charger】EPOWREY golf cart battery charger is designed to quickly and safely charge EZGO RXV and TXT golf cart batteries with 3-pin Triangular plug. Our golf cart battery charger utilize advanced smart charging technology with high output voltage and current accuracy, good stability and up to 90% efficiency to ensure efficient and reliable power for your golf cart

【18 Amp Rapid Charger/Lead-Acid】EPOWREY 18 Amp 36 Volt golf carts battery charger for EZGO TXT - D style plug.Our chargers are designed for fast, convenient and safe charging in a variety of situations.
Desulfate a Golf Cart Battery With a Pulse Charger
Before starting desulfation with a pulse charger, you must confirm that your golf cart batteries are lead-acid types and in good physical condition. Check for signs of swelling, cracks, or leaks, as pulse chargers cannot repair cells that are physically damaged or cases that are compromised. Compatibility depends on the battery chemistry; pulse charging is suitable only for flooded, AGM, or VRLA lead-acid batteries. Proper setup includes cleaning battery terminals and matching the charger to your system voltage, whether 6V, 12V, 36V, or 48V. Pulse chargers send short, high-frequency, low-current pulses aimed at breaking down sulfate crystals accumulated on the plates. This process seeks to restore active plate area and enhance the battery’s ability to accept a charge but does not repair physical damage. For moderate sulfation, leave the charger connected for 24 to 72 hours. Mild cases may respond in 6 to 24 hours, while heavier buildup could require multiple cycles. Success depends on the severity of sulfation and the internal condition of the battery; it is not solely determined by charger power. Never use pulse charging on batteries that are overheated or visibly damaged. This device is compatible with 12V, 24V, 36V, 48V, 60V, and 72V systems for various lead-acid types.

Auto 6V & 12V Detection: No Manual Switching Needed, automatically identifies 6V or 12V lead-acid batteries within seconds, eliminating guesswork and reducing the risk of incorrect settings. Compatible with cars, motorcycles, ATVs, boats, RVs, lawn mowers, and more, one smart charger for your entire garage

【UPGRADED ALL-IN-ONE BATTERY CHARGER】This isn’t just a charger — it’s a versatile 4-in-1 device that works as a battery maintainer, trickle charger, and desulfator. Charge or repair all 12-volt and 24volt LiFePO4 or lead-acid automotive, marine and deep-cycle batteries including AGM, GEL, SLA, Flooded in cars, trucks, SUVs, motorcycles, lawnmowers, boat marine, etc. (Note:This is a battery charger not battery jump starter)

Adjustable 0.5A-20A 12V/24V Universal Battery Charger: This smart charger features fully adjustable charging current — select from 0.5A, 2A, 5A, 10A, 15A, or 20A for 12V batteries, with corresponding current ranges for 24V batteries (max 10A). Perfectly adapt to different battery sizes, types, and conditions. Compatible with 12V & 24V LiFePO4, Lead-acid, AGM, GEL, EFB, SLA, Flooded (WET), Calcium, and Deep Cycle batteries. Ideal for cars, trucks, SUVs, motorcycles, boats, RVs, lawn mowers, golf carts, and more. Note: AC-powered, not a jump starter.
Test Voltage and Realistic Results After Refurbishment
Once the desulfation cycle is complete and you disconnect the charger, testing the open-circuit voltage will give you an indication of the refurbishment’s success. Let the battery rest for at least 30 minutes—ideally anywhere from 4 to 12 hours—to allow surface charges to dissipate and avoid inflated readings. For a 6V battery, aim for a voltage of 6.3 to 6.4V; for an 8V model, 8.4 to 8.6V; and for a 12V unit, roughly 12.6 to 12.8V. Larger packs, such as 36V, should read between 38.2 and 39.0V, while 48V packs should be around 50.4 to 50.93V.
A higher resting voltage indicates some level of surface recovery, but it does not guarantee the battery’s full capacity. Voltage rebound is common after desulfation, but short-term improvements do not translate directly into extended battery lifespan. A battery holding a good resting voltage may still perform poorly under load if internal resistance remains high. To accurately assess capacity, observe voltage sag while the battery is in use; significant voltage drops reveal limited capacity. If different batteries in a pack show uneven voltage readings, the pack is likely still imbalanced. Stable voltage readings paired with poor runtime suggest surface issues have been addressed, but the deep-cycle health remains unaffected.

Catch Battery Problems Early: Featured in two videos by Project Farm, a popular YouTube channel with millions of subscribers, the ANCEL BA101 helps you quickly spot battery issues before they leave you stranded. It provides easy-to-understand readings for State of Health (SOH), State of Charge (SOC), voltage, current, CCA, plus cranking and charging system tests, so you can better understand your battery and help avoid unexpected breakdowns
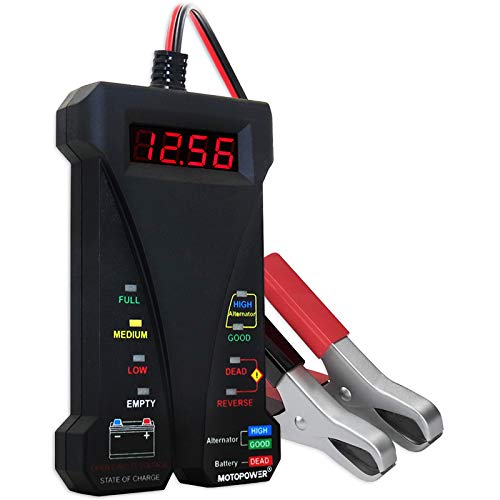
Effortless Operation - Boasting a “plug-and-test” design, there's no need for complex set-up procedures. Just connect it to the battery following simple steps. Without starting the vehicle, you can read the battery status, and after starting, quickly obtain the alternator status. Whether you're a professional mechanic or an ordinary car owner, you can easily use it to quickly determine if the battery needs jump - starting, replacement, or if the alternator output is normal.

APPLICABLE BATTERY: Compatible with: ①L03-L20 series lithium battery pack, ②L04-L24 series lithium-iron battery pack, ③ lead-acid battery of DC 12V, 24V, 36V, 48V, 60V, 72V, 84V. This battery monitor also supports custom mode in range of DC 7-100V.