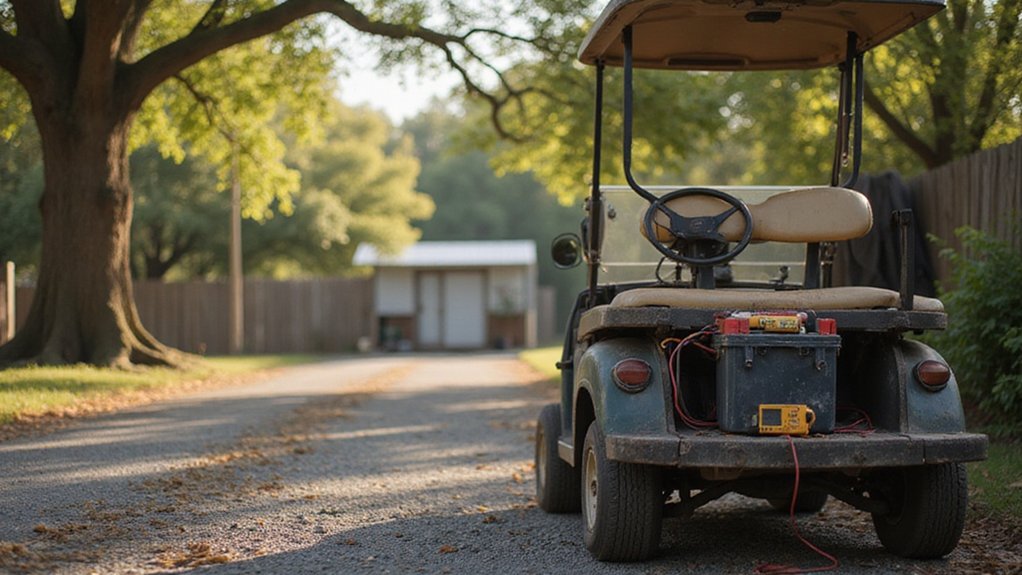
If your golf cart won’t charge, you’re probably wondering what’s wrong. Common issues include outlet problems, corroded terminals, or blown fuses that cut off power.
Sometimes low water levels or a deep discharge can also lock out the charger, preventing your battery from reaching full charge.
In this article, you’ll find simple steps to identify and fix the most common causes so you can get back on the course quickly.
Is Your Charger Actually Working? Common Failures to Check
Before blaming the batteries, ensure your charger is functioning properly. If it’s dead silent with no lights or fan, the first step is checking your AC outlet—there’s a good chance it’s not providing power. If the charger starts charging but then stops too quickly, it’s likely dealing with a deeply discharged pack the charger can’t sense. For smart chargers, don’t overlook firmware updates; outdated software can cause false failures. Consulting a Top Golf Carts guide can help you compare chargers for quality and performance. For those driving through rough terrain, investing in aggressive tread designs can ensure your charger and batteries stay protected from excessive vibration and debris. Similarly, a proper lift kit can help elevate the cart’s components away from ground-level impacts.
To verify the charger’s output, use a multimeter: measure the voltage at the connector. If the voltage doesn’t rise above the rest voltage of the battery pack, internal hardware issues are likely at play. Keep in mind that charger calibration can drift over time, leading to early shutoffs or inconsistent charging.
Fault indicators like flashing lights may appear—consult your manual for specific meanings and reset instructions. If, after these steps, no output becomes apparent, replacing the charger becomes necessary. This prevents wasting time testing batteries when the problem originates with the charger itself.

【18 Amp Rapid Charger/Lead-Acid】EPOWREY 18 Amp 36 Volt golf carts battery charger for EZGO TXT - D style plug.Our chargers are designed for fast, convenient and safe charging in a variety of situations.

Club Car Models: Club car 48 volt charger plug suitable for 1995-Up Club Car DS and Precedent golf cart.

Package: Includes connector housing, 2x pins, 3x screws
Corroded Terminals or Loose Cables? How Bad Connections Block Charging
Corroded terminals or loose cables are common causes of charging problems, even if your charger tests fine. Corrosion appears as white or green powdery buildup on battery terminals, which obstructs current flow. Loose cables from vibrations can break solid contact, leading to intermittent charging or sudden shutoffs. You might notice your charger humming but voltage barely rises, or feel warmth at the cable ends—signs that poor connections are the culprit. Many issues also stem from using a 36 volt battery that is not properly matched to the charger’s output specifications. For carts that carry heavy loads or tools, upgrading to a utility bed can help distribute weight and reduce vibration on battery connections.
Begin by inspecting each battery post and lug for crusty buildup or corrosion. Look for darkened, pitted, or damaged connectors. To clean, use a wire brush combined with a baking soda and water solution—this neutralizes acid and removes corrosion safely. Make sure everything is dried thoroughly before reattaching. Tighten the connections securely to prevent future movement, then apply a corrosion inhibitor to help protect against future buildup. Regular inspection and maintenance of your battery terminals and cables can save you time and effort, ensuring a more reliable charge every time. For those seeking further preventative solutions, 8-inch wheel covers can help shield your cart’s components from road debris and moisture.
Low Water Levels? Why Maintenance Problems Kill Battery Charging
Low water levels can significantly disrupt battery charging, even if your connections are perfect. Proper electrolyte levels are essential for the chemical reactions that produce power. When water drops below the plates, charging stops because the electrolyte becomes too thin to sustain these reactions. Exposed plates then sulfate quickly, which increases internal resistance and lowers the battery’s ability to accept a charge. This can make your charger seem faulty when, in fact, the real issue is neglected water maintenance. Regularly check your battery’s electrolyte levels after each full charge and top up with distilled water only—never add acid. Keep the fluid about a quarter to a half inch above the plates to ensure proper operation. Without maintaining water levels, batteries can overheat during charging, accelerating water loss and shortening their lifespan. Additionally, overcharging can further accelerate water loss, so using a charger with automatic shutoff helps prevent damage. Proper water maintenance prevents unnecessary replacement of batteries and ensures reliable charging performance. Neglected water maintenance is one of the habits that can drastically shorten a Trojan battery’s realistic lifespan. For electric carts, using a DOT-approved windshield helps keep debris away from battery vents, reducing the risk of water contamination.
Blown Fuses and Tripped Breakers: Electrical Protection That Stops Charging
If charging is interrupted by blown fuses or tripped breakers, the solution starts with electrical protection devices rather than a dead battery pack or failed charger. Begin fuse troubleshooting by inspecting both the charger’s external and internal fuses. A blown fuse will prevent any output even when AC power is present. Replace it with a fuse of the same rating. If it blows again after replacement, this indicates a short circuit or an overcurrent condition that needs further investigation. For EZGO owners, consulting a review of top golf cart battery chargers can help identify more reliable models that reduce the risk of these electrical faults. When choosing a new charger, consider models with cargo box compatibility to ensure a stable and protected setup. Upgrading to modern lithium battery technology can also prevent overcurrent issues common with older lead-acid packs.
Next, check the vehicle-side circuit breaker. A tripped breaker can make the charger appear dead, so locate it and reset it according to your vehicle’s manual. If the breaker trips repeatedly, examine wiring for damage or signs of water intrusion, which can cause persistent faults.
Don’t forget to inspect the receptacle fuse as well. Voltage might be present behind the receptacle but not at the plug face, signaling a blown fuse. Using a multimeter makes it easier to identify these faults quickly. Always verify that AC power is present before concluding there’s an issue with the cart or charger.

Suitable Models: Club car charger fuse fits 1995-2002 club car electric models with 48 volt battery chargers

Fits on 1994-current E-Z-GO Electric TXT & Medalist Models for Powerwise Chargers

30A Fuse Assembly, repair your 36 or 48 volt Lester battery charger
Dead Batteries Not Charging? Spotting Sulfation and Cell Failure
If your charger still won’t revive the batteries after ruling out blown fuses and tripped breakers, the issue likely lies inside the battery pack itself. One common cause is sulfation formation—lead sulfate crystals that harden on the plates after prolonged storage in a discharged state. This buildup blocks proper charging, making the battery appear dead. Light sulfation might respond to a gentle, slow charge, but severe cases are typically irreversible and require replacement. A typical 36V golf cart uses six 6-volt batteries wired in series. Upgrading to a lithium golf cart battery system eliminates lead-acid sulfation entirely, offering longer lifespan and more consistent performance. For comparison, some owners pair their cart with a top magnetic speaker for enhanced entertainment on the course.
Alternatively, internal cell damage could be the culprit. A single bad cell can drag down the entire pack, leading to reduced range, sluggish acceleration, and a charger that never completes its cycle. To diagnose this, check each battery individually. A significant voltage difference between cells indicates a dead or failing cell. Visually, white crust or corrosion on the terminals, or voltage sag under load, confirms internal damage. While mild sulfation can sometimes be treated with specialized desulfation chargers, internal cell damage almost always necessitates replacing the battery pack entirely.

【ULTRA HIGH PERFORMANCE - CLASS A BATTERY】: LOSSIGY 36V100AH Lithium Battery Golf Cart is made of class A chip, equipped with 43.8V25A smart charger, 9 in1 battery monitor, built-in 200A BMS, 3840W Powerful, 1000A peak current. IP65 waterproof. Preferred item for golf cars, trolling motors.

Get Rid of Lead Acid Batteries Now: Revolutionize your golf cart with Lithova 36V golf cart lithium conversion kit! This 48V lithium battery directly replaces 6-8V 100Ah heavy lead-acid batteries in one simple installation. Enjoy 74% weight reduction, 60% smaller size, and extended 35-mile range (effortless 5-7 Rounds of 18-hole courses). Lasts 8x longer than lead-acid batteries, Up to 15000 deep cycles ensure maintenance-free performance and long-term reliability.
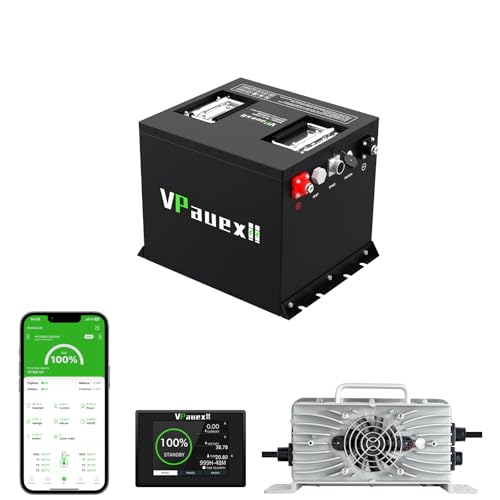
✔️ [12 Years & 6000+ Cycles]: VPauexii 36V lithium conversion kit. Built with new Grade A EV LF105 cells. 12-year lifetime and 6000+ deep cycles isn't just a claim—it's the result of our quality commitment. Full 5-year warranty. No hidden costs. Premium performance, advanced safety. The smartest value today.
Charger Settings: Why Voltage Mismatches Cause Lockouts
A voltage mismatch between your charger and cart system is a common cause of lockouts. Smart chargers need a specific voltage range to activate properly. For example, plugging a 36V charger into a 48V system prevents the charger from reaching its trigger threshold, so it stays off. Conversely, connecting a 48V charger to a 36V pack risks overcharging or activating protection mode. To avoid this, ensure the charger’s nameplate voltage matches the battery-bank voltage and chemistry. Smart chargers rely on strict charging protocols and precise voltage regulation to function correctly. When upgrading your golf cart, always consider the top motor options to maintain compatible system voltage. For added convenience, many users also invest in a roof rack for golf cart to securely transport extra gear. Choosing an extended roof can also shield your charger and batteries from rain and debris, reducing the risk of corrosion-related connection faults.
Low pack voltage can also cause lockouts. Use a multimeter to check the total voltage of the battery pack. If the voltage is below the required threshold—typically around 30 to 35 volts for a 48V system—the charger will not activate. Always verify that all specifications align before troubleshooting further.

【Professional Rapid Charger】Lztsuply chargers are Factory Outlet, which has 20 years production R&D experience. High-performance 12/15Amp smart charger, specifically for 48V Club Car with 3-pin round plug and has an extra-long 16ft power cable, equipped with 2 standard OBC lines, providing great flexibility. Perfect for 48v lead-acid battery systems, this industrial-grade charger delivers fast, safe and efficient charging to keep your golf cart running at peak performance.

【15 Amp Rapid Charger/Lead-Acid】 EPOWREY 48 volt battery charger for Club Car golf carts with 3-pin round plug.This charger is designed as a one-piece plug, using a rubber cord that is more abrasion-resistant and heat-resistant than PVC cords, and have effective waterproofing advantage.

48V 15A GOLF CART CHARGER: Built for EZGO RXV and TXT golf cart batteries. FirstPower golf cart charger features upgraded 3-pin Triangular plug for instant plug-and-charge simplicity, are perfectly compatible with the golf cart. Optimized for 48V lead-acid systems (excludes lithium), its adaptive charging algorithm prevents sulfation. The ultimate 48V battery charger replacement for fast, reliable power delivery.
Deep Discharge Mode: Lithium and Lead-Acid Side Effects
Deep discharge mode can cause serious damage to batteries, whether lead-acid or lithium. In lead-acid batteries, discharging below 11.8 volts triggers sulfation—where lead sulfate crystals form inside the plates. These crystals block normal chemical activity, reducing the battery’s capacity by up to 50% after just one deep cycle. If left discharged for over 60 days, the sulfation becomes permanent, and physical damage like plate shedding can cause short circuits, leading to total failure. To prevent such damage while operating the vehicle, it is important to follow safe golf cart driving tips such as avoiding steep hills that could hasten deep discharge. Using a proper smart charger can help prevent sulfation by automatically adjusting voltage and preventing over-discharge.
Lithium batteries have more protection through their built-in battery management systems, but deep discharge still harms their internal chemistry. You’ll notice capacity loss, increased internal resistance, and heat buildup. Repeated deep discharges cause lithium plating and damage to the solid electrolyte interphase layer, shortening the battery’s lifespan by three to five times. In some cases, the battery may even lock out, refusing to accept a charge—an indication of severe internal damage.
Six Quick Fixes to Try Before Replacing Batteries or Your Charger
To troubleshoot charging issues before replacing batteries or your charger, start with basic power management checks. Ensure the wall outlet is working by plugging in another device. Confirm that the charger’s power switch is turned on and inspect the cord and pins for damage or corrosion. Make sure the plug fits firmly into both the outlet and the equipment’s receptacle, as loose connections can prevent charging.
Next, examine the battery’s contact points. Look for corrosion—green or white residue indicates oxidation—clean these contacts carefully, and replace any worn or damaged connectors. Check the DC fuses and circuit breaker in your system; a blown fuse should be replaced with one of the same amperage rating to restore proper function.
Measure the battery pack voltage directly at the terminals with a multimeter; if the voltage is below the charger’s minimum required level, the charger may not activate. Test each individual battery cell for weakness or faults, as weak cells can bring down the entire pack’s performance. Tighten any loose or corroded terminals to ensure a solid electrical connection.
Finally, isolate the problem by testing your charger on another cart or trying a known-good charger on your equipment. Often, a simple issue like a blown fuse, loose wire, or dirty pin prevents charging, and addressing those can save you the expense of replacing components unnecessarily.

48V 15A GOLF CART CHARGER: Built for Yamaha G29 Drive & Drive 2 golf cart batteries. FirstPower golf cart charger features upgraded 3-Pin Leaf plug for instant plug-and-charge simplicity, are perfectly compatible with the golf cart. Optimized for 48V lead-acid systems (excludes lithium), its adaptive charging algorithm prevents sulfation. The ultimate 48V battery charger replacement for fast, reliable power delivery.

【48 Volt 15 Amp Golf Cart Charger】EPOWREY golf cart battery charger is designed to quickly and safely charge EZGO RXV and TXT golf cart batteries with 3-pin Triangular plug. Our golf cart battery charger utilize advanced smart charging technology with high output voltage and current accuracy, good stability and up to 90% efficiency to ensure efficient and reliable power for your golf cart

【Upgraded Battery Charger】AUTOUTLET 8 volt battery charger extends the charging cable, adds a carrying handle to make it more convenience to use; and adopts the cable clamps of thickened material which can hold the battery terminals more firmly