
Getting a flat or damaged golf cart tire can be frustrating, especially if you’re unsure how to change it yourself. Luckily, with the right tools and some basic steps, you can handle the swap without much fuss.
By the end of this guide, you’ll know how to safely remove a worn-out tire and install a new one with confidence.
Let’s walk through the process step by step.
Assess the Damage Before You Start
Before attempting to change a golf cart tire, thoroughly evaluate the damage. Start by inspecting the tread depth and surface wear. Center wear typically indicates overinflation, while edge wear on both shoulders suggests underinflation. Uneven wear patterns may also point to a wheel alignment issue. Carefully look for sidewall cuts, cracks, or bulges—these signs show structural failure and cannot be repaired. Check the tread for punctures, particularly near the sidewall, where repairs are unsafe. Inspect the bead and rim for rust, corrosion, or poor seating. Use soapy water around the valve stem and check for bubbles to identify slow leaks. If the tire shows signs of dry rot, it should be replaced even if the tread appears decent, as dry rot can cause hidden failures. For example, choosing a tire with enhanced sidewall protection can help prevent future damage from rough terrain. Taking this step ensures you’re addressing all potential problems before beginning the repair. Just as with battery maintenance, proper tire inspection can prevent unexpected downtime and ensure safe operation. For top performance, consider selecting a tire that offers superior traction and durability for different driving conditions.
Tools and Parts You’ll Need for the Job
To successfully replace a golf cart tire, you’ll need a comprehensive set of tools and safety gear. Start with a floor jack, jack stands, and wheel chocks to lift and stabilize the cart safely. Use a lug wrench or socket set to remove the wheel nuts, then a torque wrench to tighten them properly during reassembly. To separate the tire from the rim, a bead breaker or a large C-clamp is essential, along with pry bars for stubborn beads. An air compressor and tire pressure gauge ensure the tire is inflated to the correct pressure after mounting. Valve stem tools, tire lube, and rags are necessary for cleaning the rim and installing the new valve stem smoothly. Protect yourself with safety glasses and gloves to guard against debris and pinch points. Keep a replacement tire of the correct size and new valve stems handy to complete the job efficiently. Consider that high-performance lithium models often feature durable low-rolling-resistance tires to enhance range and handling. For those upgrading to a lithium battery system, selecting a compatible tire helps maximize the battery’s range and overall efficiency. If you are also installing a lift kit, a 6 inch lift kit can improve clearance and allow for larger tires.

1️⃣ CONTROLLED BEAD BREAKING — This manual tire bead breaker clamps to the rim and drives the breaker foot down with screw leverage to unseat stubborn beads. Use it as an ATV tire bead breaker, small tire bead breaker tool or tractor service aid when steady, controlled force is preferred.

1️⃣ CONTROLLED BEAD BREAKING — This manual tire bead breaker clamps to the rim and drives the breaker foot down with screw leverage to unseat stubborn beads. Use it as an ATV tire bead breaker, small tire bead breaker tool or tractor service aid when steady, controlled force is preferred.

1️⃣ CONTROLLED BEAD BREAKING — This manual tire bead breaker clamps to the rim and uses a screw-driven breaker foot to unseat stubborn tire beads with focused leverage. The bead breaker tool for tire removal gives you a controlled way to start ATV, UTV, mower and tractor tire service.
Park, Block, and Prep Like a Pro
To safely lift your golf cart, start by parking it on a flat, level surface. Turn off the vehicle completely and remove the key to prevent accidental movement. A firm, level spot is essential because it keeps the cart from shifting as you lift or work on it. Steer clear of slopes or soft ground, which could cause the cart to slide or rock. Engage the parking brake firmly to add extra security, but don’t rely on it alone. Use wheel blocking devices—such as chocks, bricks, or wood blocks—to secure the wheels that will remain on the ground. If you plan to change a front tire, block both rear tires, or vice versa. For models with electric power, ensure the Trojan batteries are secure and disconnected before lifting to avoid shifting weight. Proper electrical system function relies on components like heavy-duty solenoids to prevent power surges during maintenance. Blocking the wheels is crucial because it stabilizes the cart during lifting, especially if you need to perform tire inflation or wheel balancing later. Before raising the cart, double-check that it isn’t rocking or unsteady, and clear the work area of any clutter. If your cart uses a 48-volt lithium battery, ensure it is properly secured to prevent movement during the lift. Proper preparation ensures your work is safe and more accurate, helping with subsequent steps like wheel balancing. Once the cart is elevated on a suitable lift or jack, place jack stands beneath the secure points. Only remove the blocking devices once the work is complete and the cart is lowered back onto a level surface.
Loosen Lug Nuts on the Ground
Loosen the lug nuts while the cart’s still on the ground because the wheel’s weight provides the resistance needed to prevent it from spinning. Ground contact offers the necessary force to break the initial tension without forcing the tire to turn or wobble. You should only loosen each nut by half to one full turn counterclockwise at this stage—don’t remove them completely yet. This initial step makes later removal easier and reduces the effort required. Since lug nuts can be corroded or stuck tight, use a steady, controlled force with the appropriate-sized wrench—most EZGO or Club Car models need a 3/4-inch wrench, Yamaha models typically require 19 mm. For stubborn nuts, a breaker bar can give you extra leverage. Always keep the cart stable by chocking the wheels and setting the parking brake before starting. This stability helps prevent slips and makes loosening the nuts safer and easier. Ensuring your solenoid is in good working order, as reviewed in top solenoid options, can prevent unexpected electrical failures that might leave you stranded mid-repair. Properly maintained battery charger connections can also prevent electrical issues that might stall the cart during this task. For rough terrain, a lifted golf cart may require a larger jack to clear the suspension clearance.
Place the Jack at the Right Point
Place the jack at the right support point, specifically under a reinforced metal area designed to bear weight. For the front of the vehicle, position the jack on the main frame rail or crossmember near the wheel, ensuring it contacts a solid, centralized steel section. For the rear, locate the rear frame rail close to the tire or on approved axle tube points. Always target structural steel members that stay stable as the cart rises. Avoid placing the jack under plastic panels, thin brackets, or rounded surfaces, as these are not built to support weight and can cause slipping or damage. Check your owner’s manual for specific lift points to confirm you’re accessing a strong load path. If your cart uses an electric powertrain, be aware that the battery weight distribution can affect how the frame settles, requiring extra care when positioning the jack. Keep the jack head flat against the frame and ensure it sits squarely on level ground to prevent slips. Proper positioning is especially important to maintain stability, just as choosing secure seat belts ensures safety when riding in a golf cart. For those who also enjoy upgrading their ride, top golf cart subwoofers can enhance the audio experience during your trips.
Lift the Cart and Remove the Old Tire
Lift the cart carefully using a jack and remove the old tire. Raise the cart gradually until the tire is about 2 to 3 inches off the ground—lifting too high offers no benefit and increases safety risks. Always lift from the cart frame, avoiding plastic panels or other fragile parts. Stabilize the cart with jack stands to prevent slipping or tipping during the process. If an entire stud spins with the lug nut instead of just the nut turning, this indicates a stripped or damaged stud requiring special removal techniques. When working near the battery compartment, always follow a safe battery hookup guide to avoid electrical hazards. Ensure your charger is disconnected before any battery work to prevent sparks, and refer to a Top Golf Cart Battery Chargers for Ezgo review for compatible models.
Before removing the tire completely, loosen the lug nuts while the tire still makes contact with the ground; this provides resistance and makes turning easier. Once the nuts are loosened, lift the cart fully, remove the nuts and keep them in a safe spot. Slide the wheel straight off the hub, ensuring you don’t damage the studs. If the tire is stubborn, give it a gentle wiggle rather than yanking on it.
Check the tire’s pressure before fully deflating it to facilitate separation. Remember your rotation pattern now to ensure proper placement later, which simplifies the process and maintains even wear. If you plan to store the cart after tire work, a proper golf cart cover can protect it from the elements. Carefully set the removed tire aside to prevent any damage to the rim.
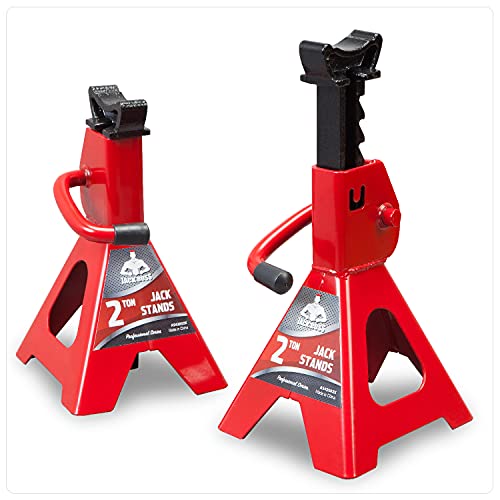
Specifications:2 ton (4,000 lb) capacity for single jack stand; Lifting range from min 9.8 " to max 15"; Net weight: 10.5 lb, which suitable for most 2 Ton Low profile autos, not recommendable for Pick-Up, Truck, too big SUVs etc. whose automobile chassis higher than 15".

Pair of 3 Ton (2.7 metric Ton) jack stands with 6,000-pound capacity

Constructed of high-grade forged steel with a welded frame design for durability, Suitable for most 2 Ton small autos, not recommendable for Pick-Up truck, truck, too big off-road SUVs etc.
Align and Install the New Wheel Assembly
Slide the old tire aside and bring the new wheel assembly to the hub. Begin by cleaning the hub face and the wheel mating surface thoroughly—any debris can cause runout and compromise hub integrity. Match the bolt pattern and center bore on the new wheel to those of the hub exactly. Carefully slide the wheel onto the hub, ensuring it sits flush against the mounting face. If a hub-centric ring is necessary, install it now for accurate centering and improved wheel balance. Before fully seating the assembly, align the valve stem opening to ensure proper orientation. For added protection against weather and debris, consider reviewing top enclosure options to shield your cart during this maintenance. For a lightweight and durable upgrade, consider the best small electric golf carts that feature compact wheel assemblies.
Start by hand-threading each lug nut onto the studs to prevent cross-threading. Keep the wheel flush against the hub while turning the lug nuts, and verify that all studs engage smoothly. Tighten the lug nuts just enough to hold the wheel securely in place; final tightening will occur afterward. Use the steering wheel to keep the wheel centered and position the cart on a flat, stable surface. Confirm that both front tires point straight ahead and are aligned at the same visual angle for proper tracking. After installing the new wheel, verify the suspension is level and aligned using frame references as done previously with the upgraded leaf springs and spacer blocks.

2 Packs of club cart front wheel hub replacement assembly, include aluminum hubs, bearings, races, lug bolts, plastic dust covers. Directly replacement for your damaged or worn out parts.

[Suitable For]: Golf cart front wheel hub assembly compatible with Club Car DS&Precedent 2003-up, Tempo 2018-up gas or electric golf carts (Not fit DS model cart with metal dust covers)
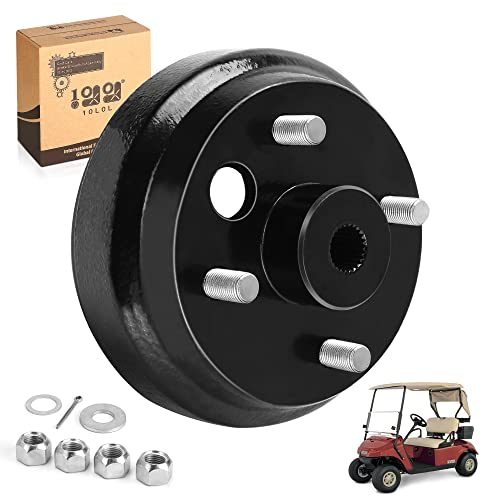
Golf Cart Brake Drum Hub Assembly for EZGO TXT 1982-up Electric Vehicles and 1982-1993 2-Cycle Gas Vehicles.
Torque Lug Nuts in a Crisscross Pattern
To properly torque lug nuts in a crisscross pattern, follow these steps to ensure even seating and secure attachment. Start by hand-tightening each lug nut in the correct pattern: for a 4-lug wheel, use an X pattern; for a 5-lug wheel, follow the star sequence. This prevents cross-threading and keeps the wheel centered on the hub.
Set your torque wrench to 50–60 foot-pounds, which is typically recommended for golf carts. Begin tightening each lug nut in the same crisscross pattern, applying gentle pressure. Once all nuts are snug, tighten them further in the same pattern to reach the final torque. Remember, after the initial tightening, perform a second pass to verify all nuts meet the specified torque. Proper torque prevents uneven wheel clamping, maintaining wheel balance and even tire pressure, while over-tightening risks damaging the studs and compromising safety.

40lb +/- 5 torsion, the best value to ensures that the clubs head and adapter screw are securely attached (even for high swingspeed:120+) without being over-tightened

PRECISION & RELIABILITY - Manufactured in Taiwan and pre-calibrated to an accuracy of +/- 4%, ensuring dependable results. Includes a calibration certificate with a traceable serial number, so you can trust in the precision of every use.

THE ULTIMATE BIKE TOOL - This 15-Piece bicycle torque wrench features precise scales of 2~26 Newton Meter (17.7~230.1 in-lb) with micro-adjustments to 0.2 Nm. Includes bit sockets: HEX - H2, H2.5, H3, H4, H5, H6, H8, H10. TORX - T10, T20, T25, T30 | 3-inch Extension bar & 1/4-inch Adapter.
Final Tire Checks Before Removing Chocks
Once the lug nuts are torqued to the specified setting, the final checks must be completed before removing the chocks. First, verify the tire pressure with a gauge and inflate it to the manufacturer’s recommended PSI. Proper pressure ensures optimal handling and safety, preventing premature tire wear or blowouts. Next, visually inspect the wheel alignment; the tire should sit centered on the hub with no wobbling. Confirm that your cart remains on a firm, level surface, with the parking brake fully engaged and the gear selector in park.
Chocks should stay snug against the grounded wheels until all other conditions are confirmed. Do not remove them yet—make sure the jack stand is holding the cart securely and that the wheel is fully installed. Only lower the cart completely to the ground before pulling the chocks away. After a short drive, recheck the lug nuts to ensure they haven’t loosened. Skipping these steps can lead to unintended rolling, compromising safety and the reliability of your tire change.

Accurate, Dependable Readings: Factory‑calibrated to ±1 PSI, so you can confidently match your vehicle’s recommended PSI (check the door jamb sticker). Ideal for monthly checks and road trips — consistent results every time, cold or warm.

Performance tested & calibrated accurate to ANSI standards (±1.5%), ensuring precise low PSI tire pressure readings without relying on batteries; designed for the low pressure tires on your ATV, UTV, dirt bike, tractor, or off-road vehicle

1.1-20 PSI LOW PRESSURE: Accurately measure from 1-20 PSI with 1.5 PSI precision—essential for RO tank, Golf Carts, ATV, UTV Lawn Mower. Standard gauges (starting at 20 PSI) cannot achieve this, preventing underinflation damage and poor handling.